This guide shares my learnings with a Synology DS920+ using Container Manager Projects. Official PhotoStructure Synology docker instructions exist, this just adds some extra flavor to that.
Table of Contents
- Revision history
- Create user just for PhotoStructure
- Get user PUID / GUID with GUI
- Folder paths for Docker Compose Wizard
- Updating YAML with Synology Projects GUI
- Updating
latest - Updating non-
latest - SSD Volume (M.2 and 2.5")
- Faster import/rebuild (and less responsive NAS)
Revision history
- 2026-04-11 add section Updating Projects YAML with Synology GUI
- 2026-04-10 convert posts to Discourse Wiki format and update for 2026.4.x
Create user just for PhotoStructure
Also see Dr. Frankenstein: Step 2: Setting up a restricted Docker user and obtaining IDs
You can skip this, but a custom user makes it easier to customize permissions now and later. For example when adding a new Synology Shared Folder for some extended family for PhotoStructure, I was able to do that without worrying about Jellyfin or anything else touching those files. Note Dr Frankenstein has a single user for all docker containers, which might reduce permissions issues if you have multiple containers reading/writing the same files. I haven’t personally run into any issues yet ![]()
![]()
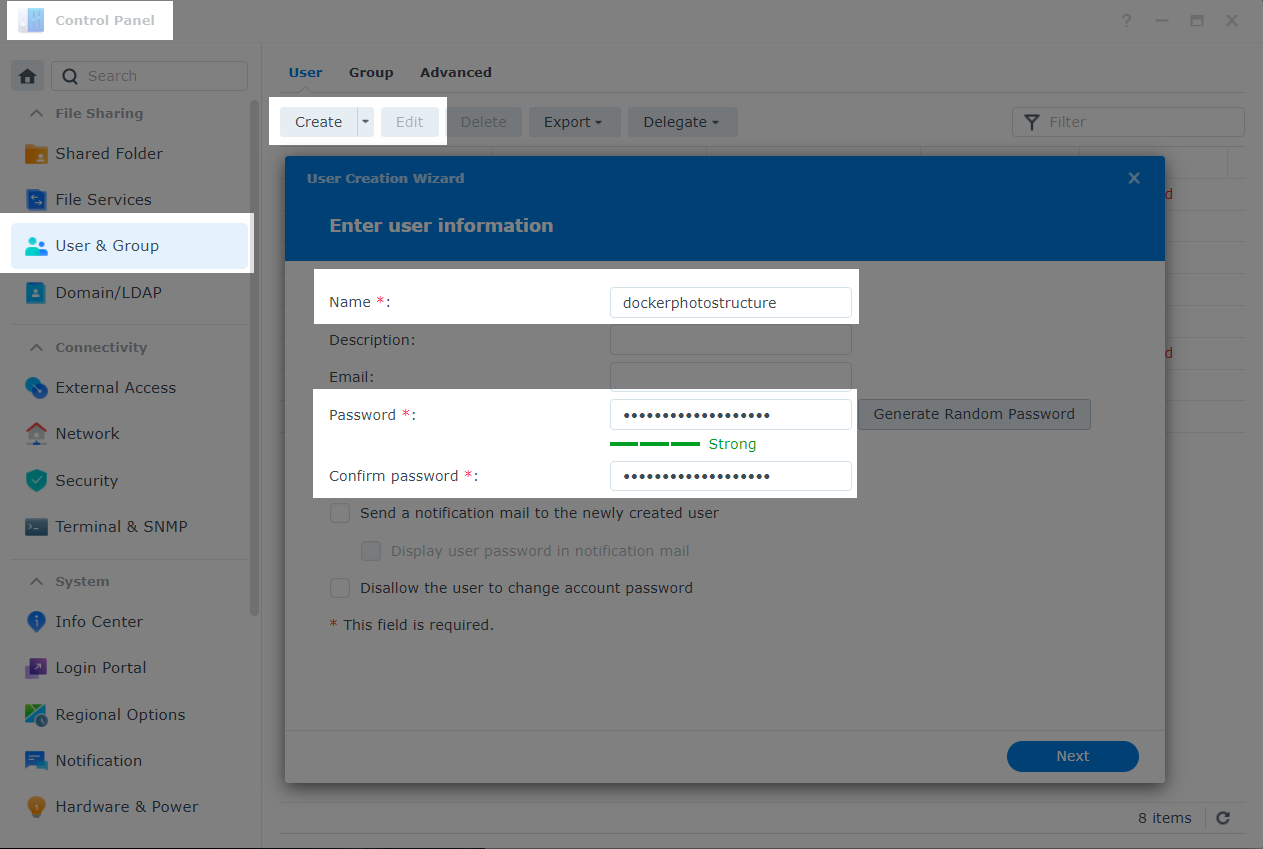
- Control Panel → User & Group → Create.
- Control Panel → User & Group → Edit lets you make changes later.
- Follow User Creation Wizard to create username and password. I chose
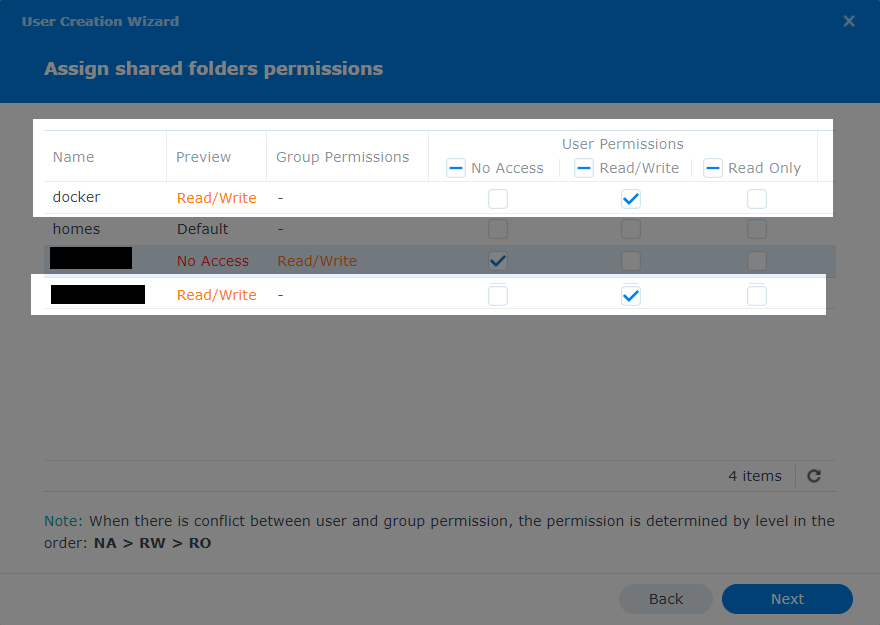
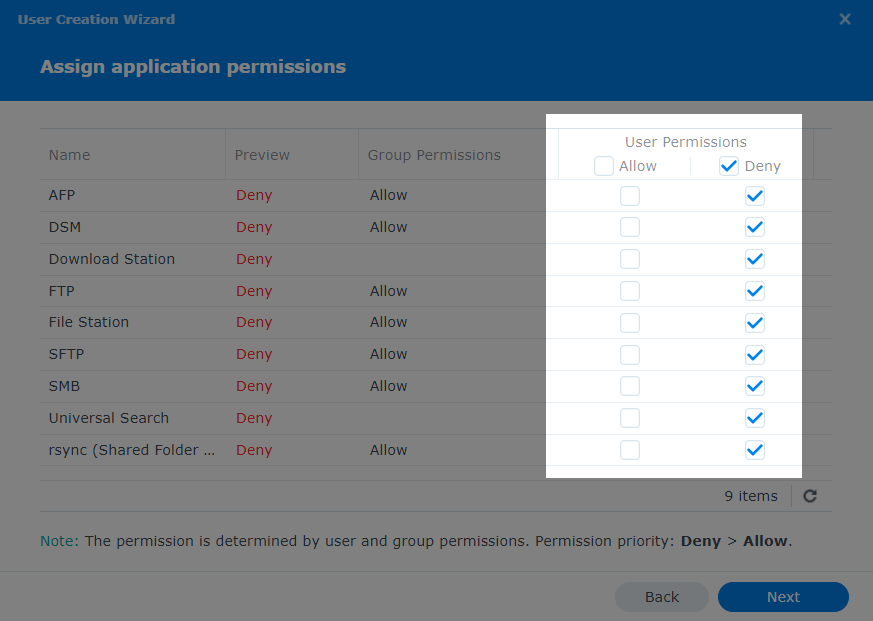
dockerphotostructure. - Assign permissions:
- Shared Folders: Deny all, except you will need to grant Read/Write to docker shared folder and your photos/videos folder(s). If desired, you can set Read-Only for photos/videos later with the Docker Compose Wizard. Read/Write is required for the docker folder(s) for PhotoStructure’s library, tmp, etc. My shares are
dockerandmain. - Applications: Deny all.
- Shared Folders: Deny all, except you will need to grant Read/Write to docker shared folder and your photos/videos folder(s). If desired, you can set Read-Only for photos/videos later with the Docker Compose Wizard. Read/Write is required for the docker folder(s) for PhotoStructure’s library, tmp, etc. My shares are
- Finish.
Get PUID / GUID from GUI
Also see Synology: Find UID (userID) and GID (groupID) in 5 Seconds – Marius Hosting, EXCEPT his tutorial requires you to set up email which is actually not necessary.
You don’t need SSH to get the user PUID / GUID, we can get this from the control panel using Synology’s Task Scheduler!
- Control Panel → Task Scheduler → Create → Triggered Task → User-defined script.
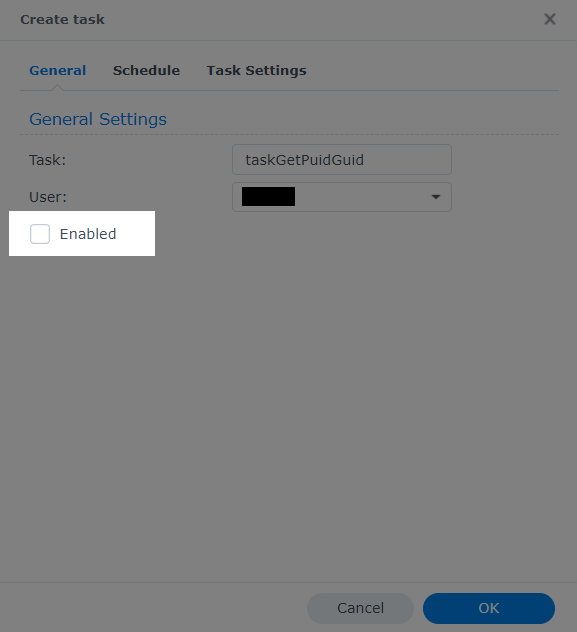
- General tab:
- I named it
taskGetPuidGuidand run as myself (my user is in the admin group). - Uncheck Enabled so it never runs automatically.
- I named it
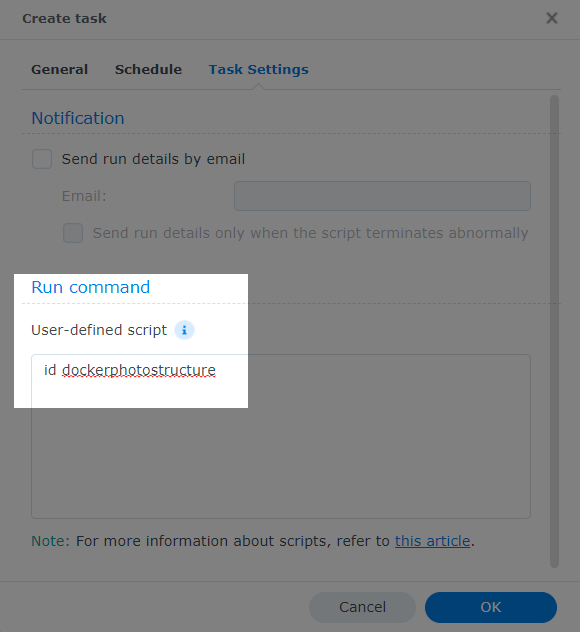
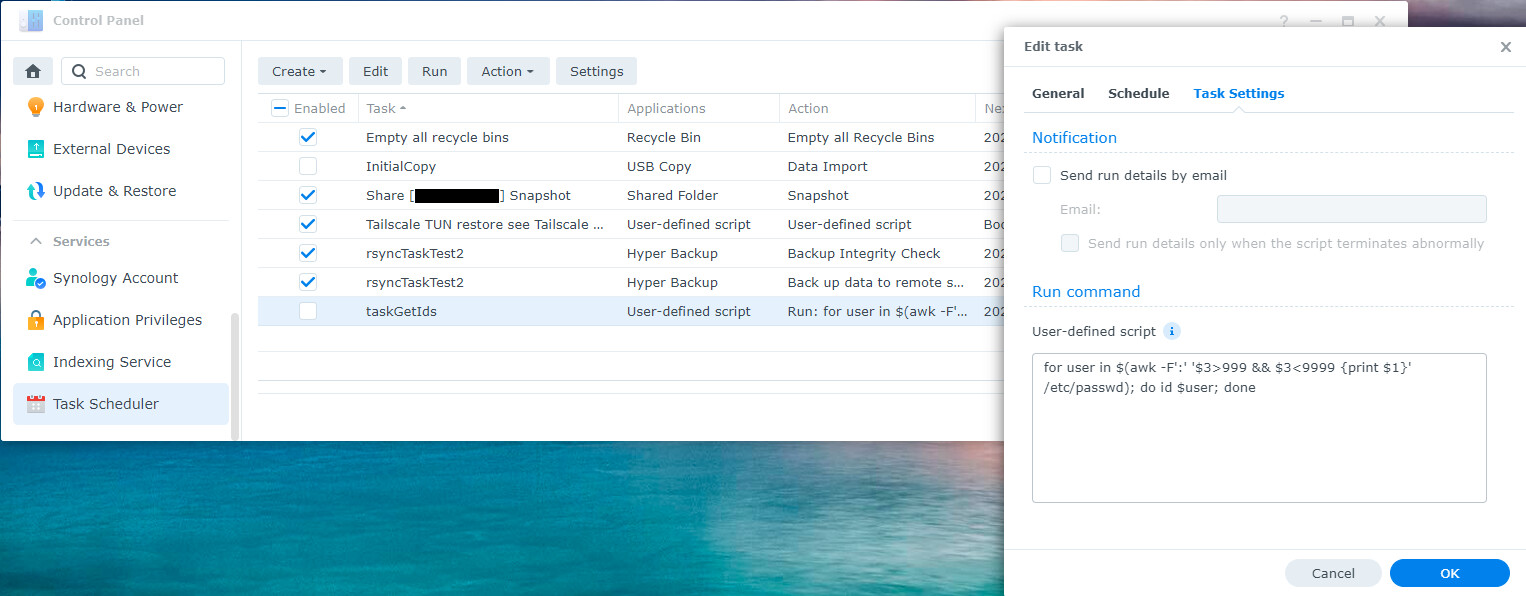
- Task Settings tab:
- Uncheck Send run details by email
- User-defined script:
id dockerphotostructure
- Click OK.
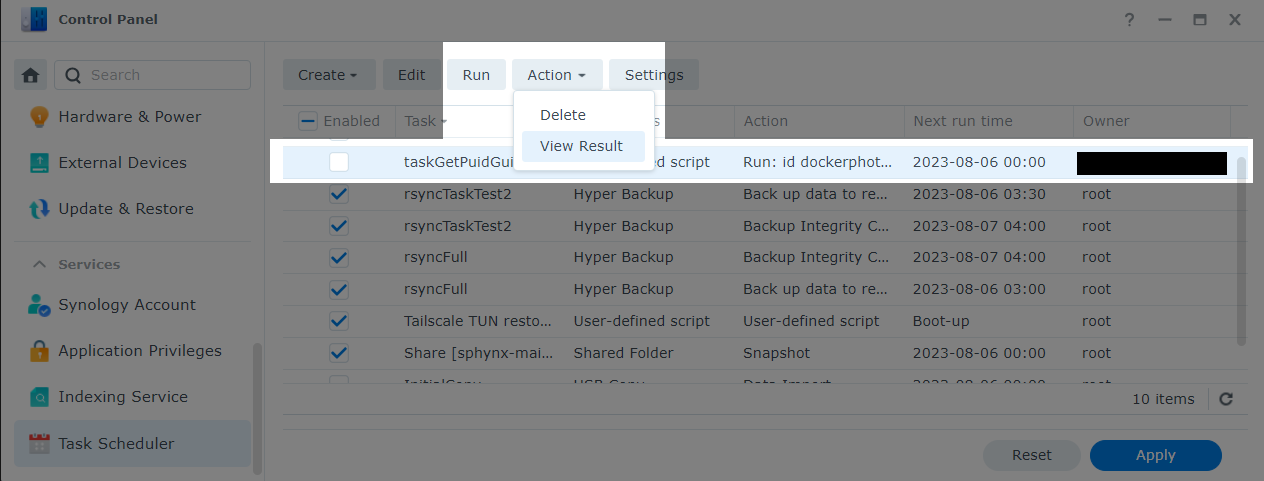
- Select the task → click Run.
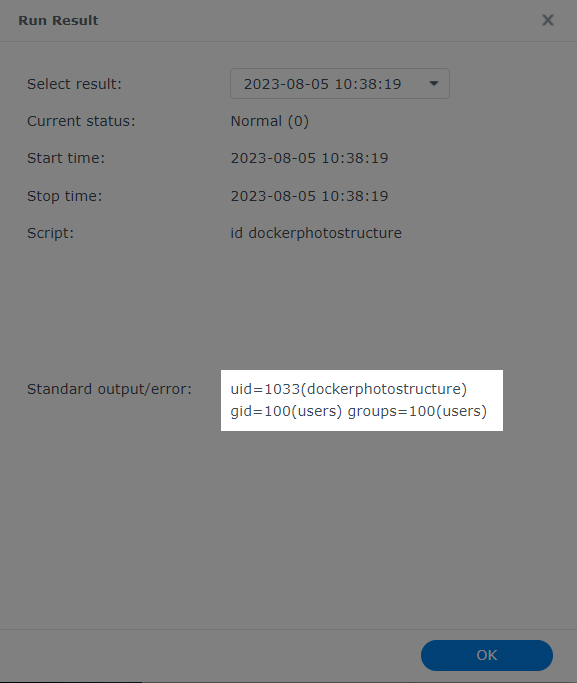
- Select the task again → click Action → View Result.
- It will be something like
uid=1033(dockerphotostructure) gid=100(users) groups=100(users):- PUID = number after
uid=(e.g.1033) - GUID = number after
gid=(usually100on Synology)
- PUID = number after

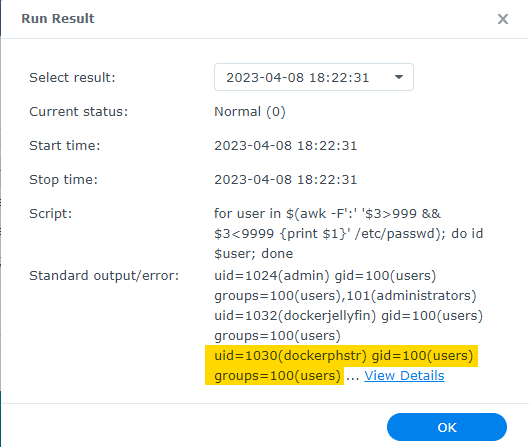
The following more advanced script lists all non-system usernames with PUID and GUID:
for user in $(awk -F':' '$3>999 && $3<9999 {print $1}' /etc/passwd); do id $user; done
Folder paths for Docker Compose Wizard
PhotoStructure provides Docker Compose Wizard which includes a Synology preset and shareable links with your customizations saved in the URL. My config as of 2026-04-11 looks like https://photostructure.com/server/docker-compose-wizard/?plat=synology&lib=%2Fvolume2%2Fdocker%2Fphotostructure%2Flibrary&puid=1026&nf=1&scan=%2Fvolume1%2Fmain%2FMedia
Following the official PhotoStructure instructions worked well. The main part I found tricky was making a docker shared folder with photostructure/library subfolder, and figuring out the exact right path to enter into the Docker Compose Wizard. The easiest way I found to do this was:
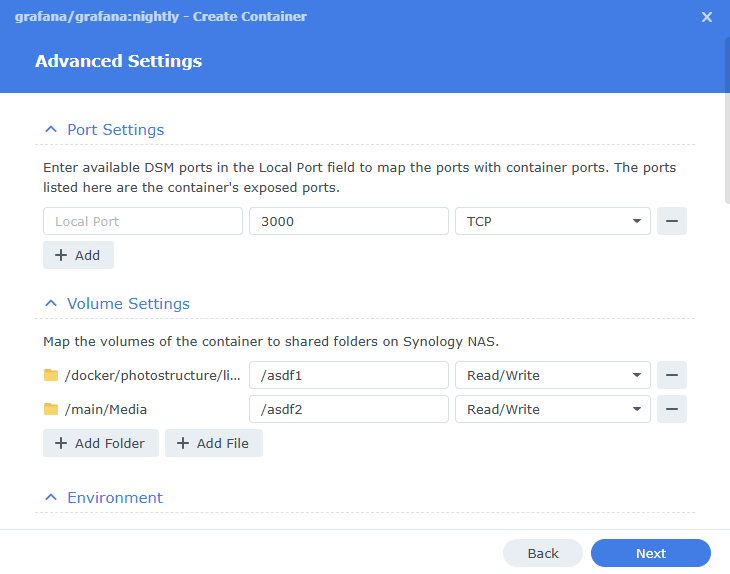
- Pretend to start making a PhotoStructure docker container using the
Create Containerwizard, using any old image. If you do not have any images yet, downloadlatestor something else fromhttps://hub.docker.com/r/photostructure/server. - The wizard includes a GUI for mapping folders, so use GUI to select folders then fill in a fake mapped path so you can click “Next”.
- Uncheck “Run this container after the wizard is finished”
- Finish the wizard.
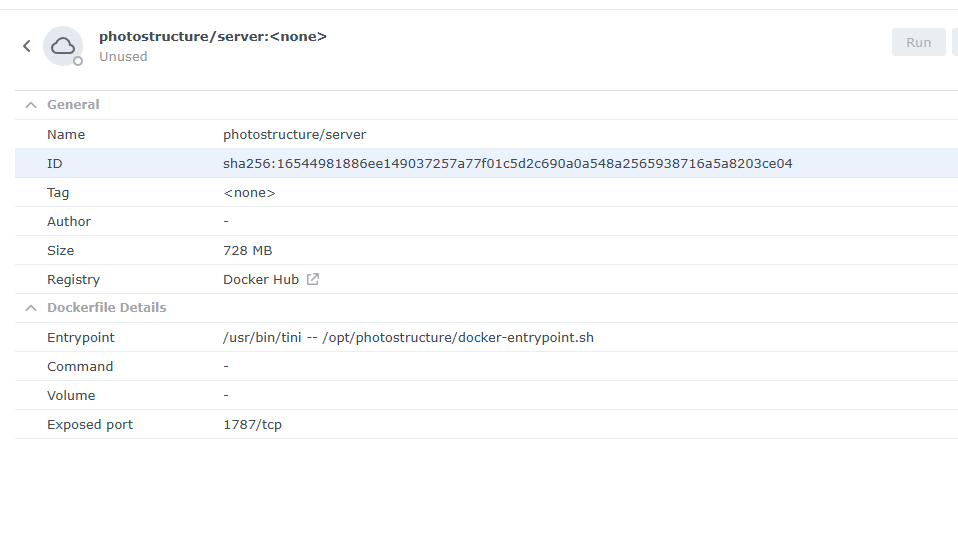
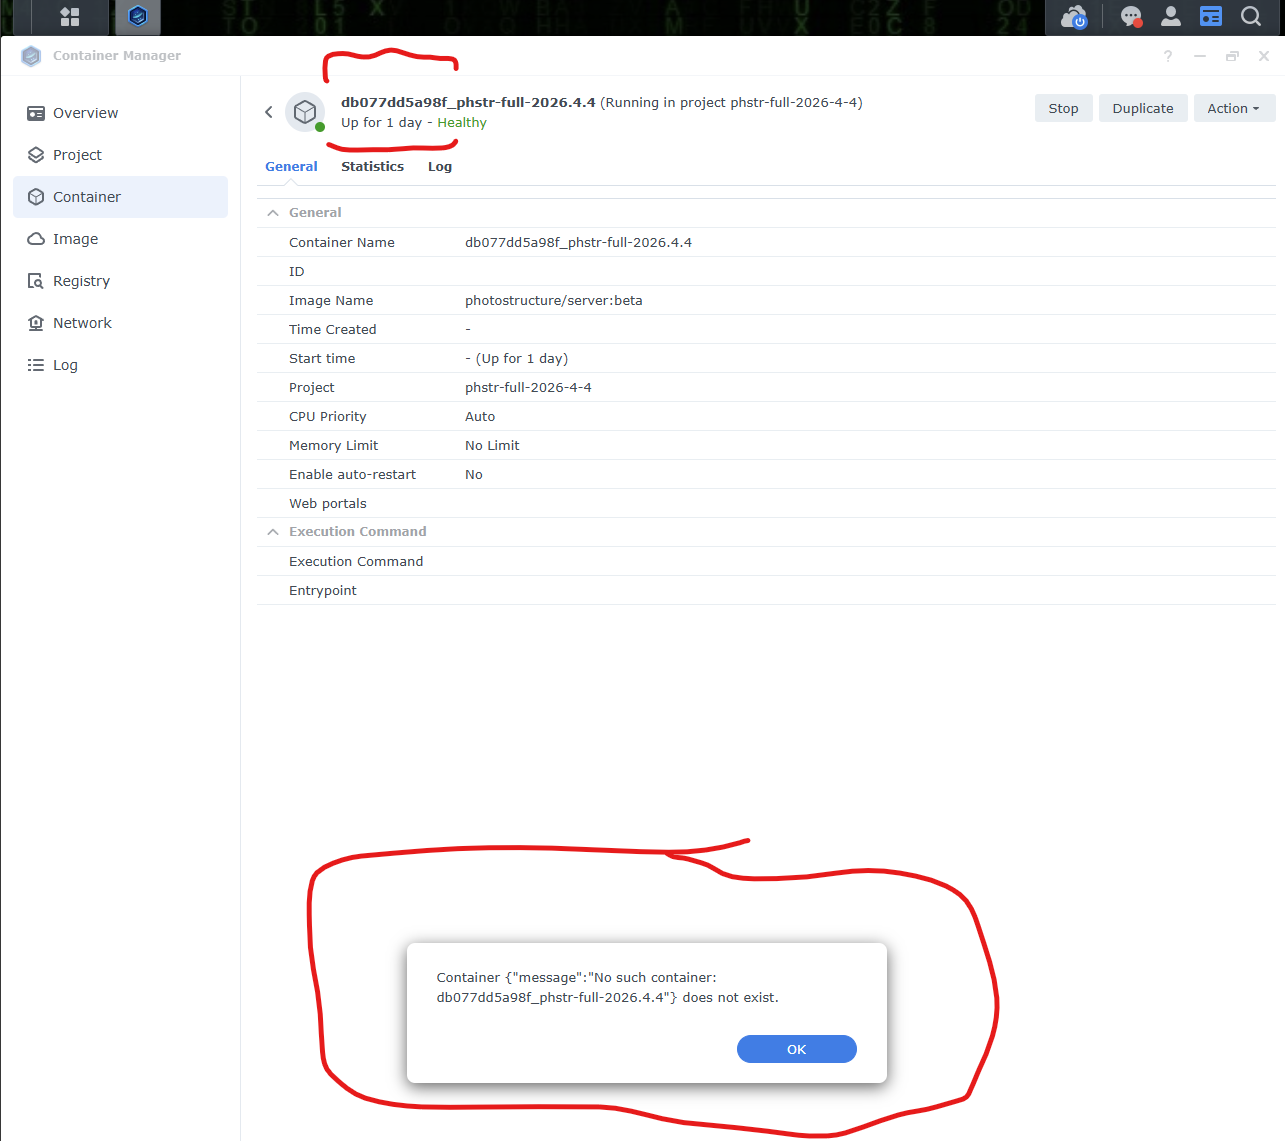
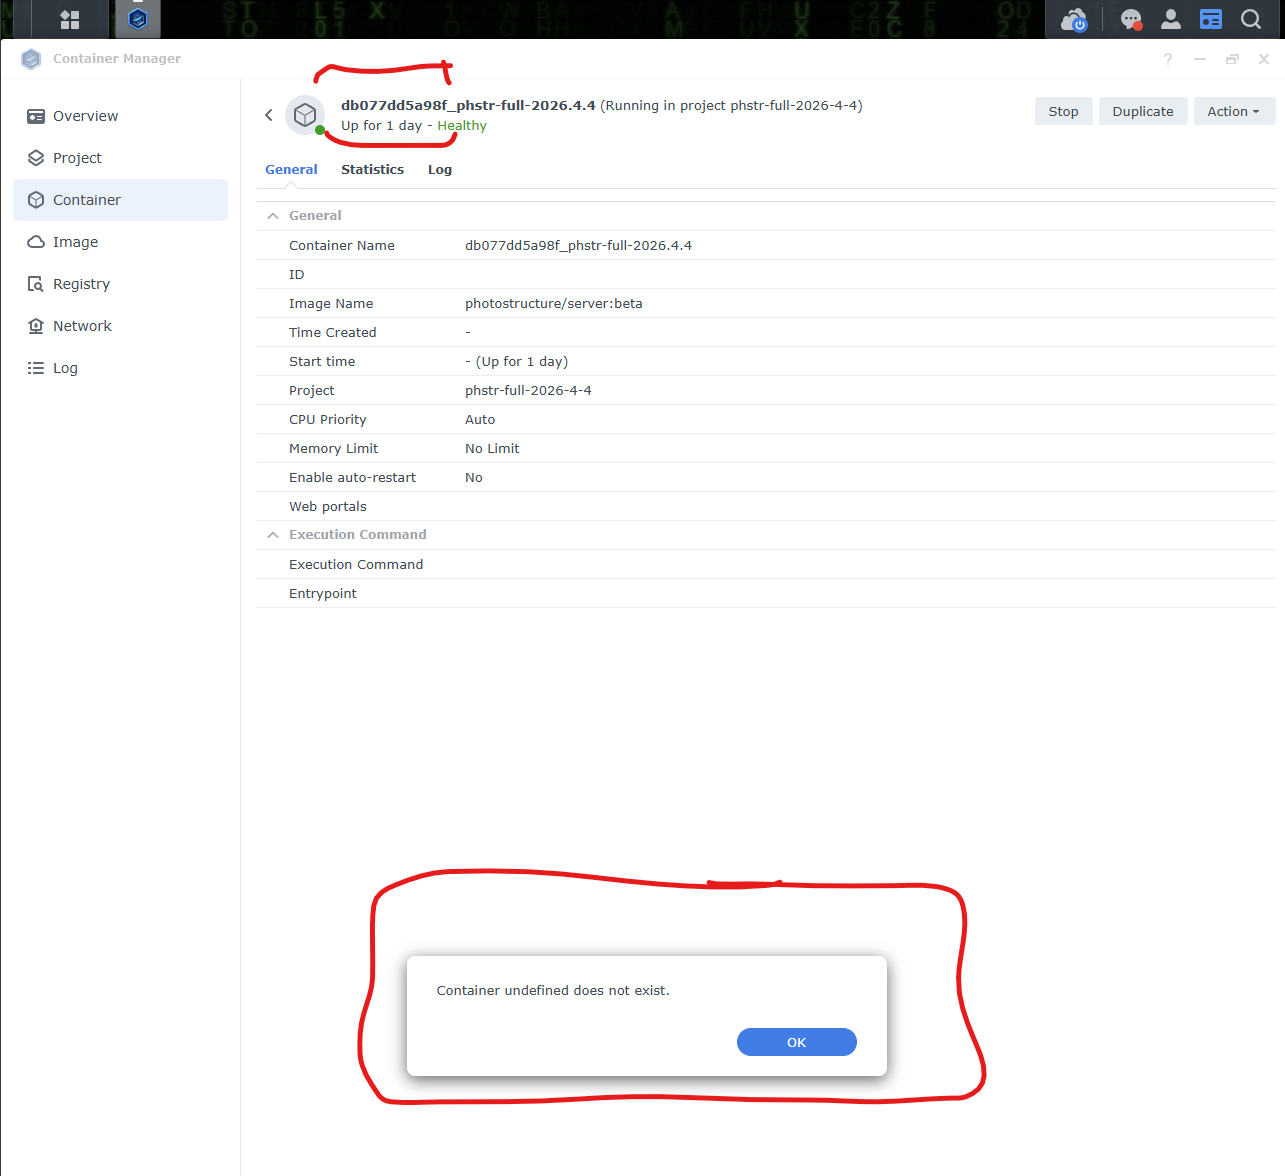
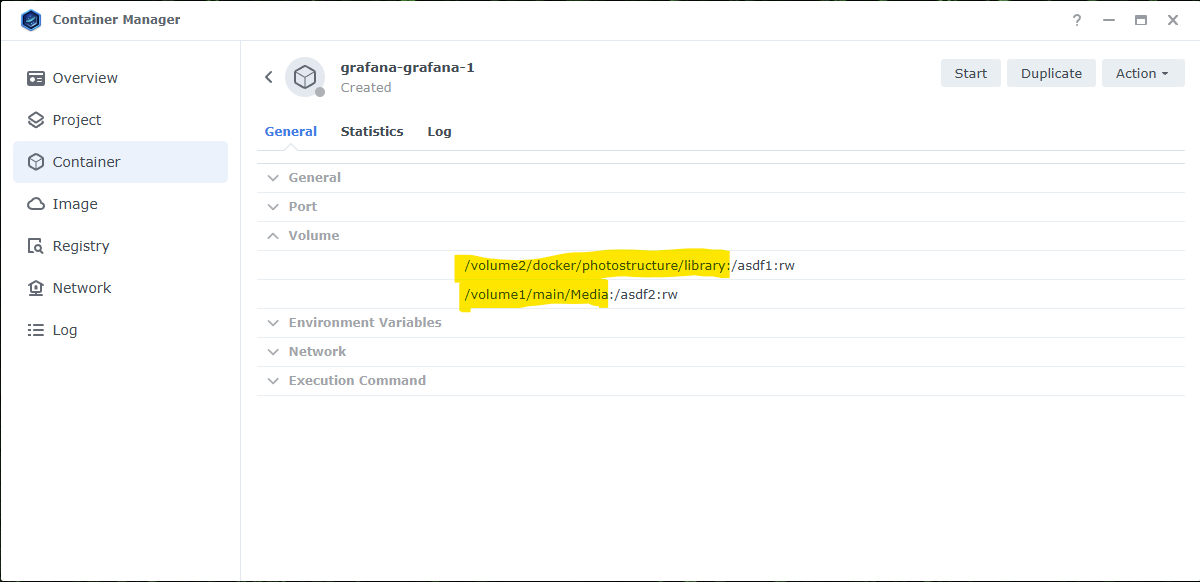
- Click into the container. In the “General” tab, the full filepath needed for Docker Compose is written out before the
:colon.
Once you’ve figured out the folder path, delete the container since that’s all we needed from it.
Updating YAML with Synology Projects GUI
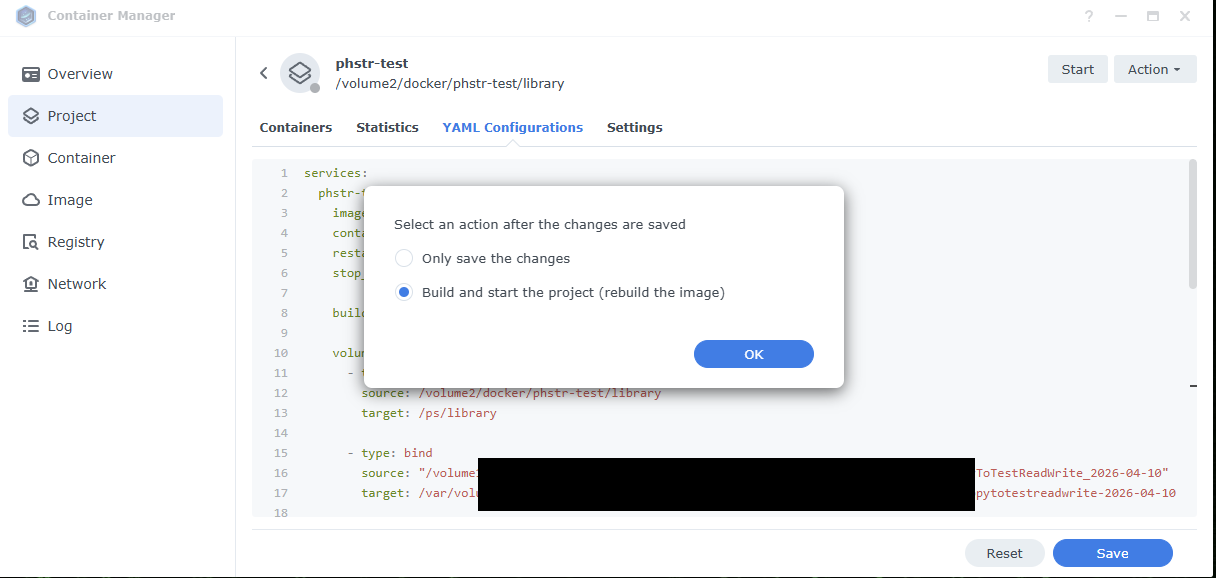
As of 2026-04-11, DO NOT edit, save, then Build and start the project (rebuild the image). If you skip cleaning, you may lose the ability to stop and edit your project again until after rebooting your entire Synology NAS (more details). Rebooting is much more annoying than first cleaning:
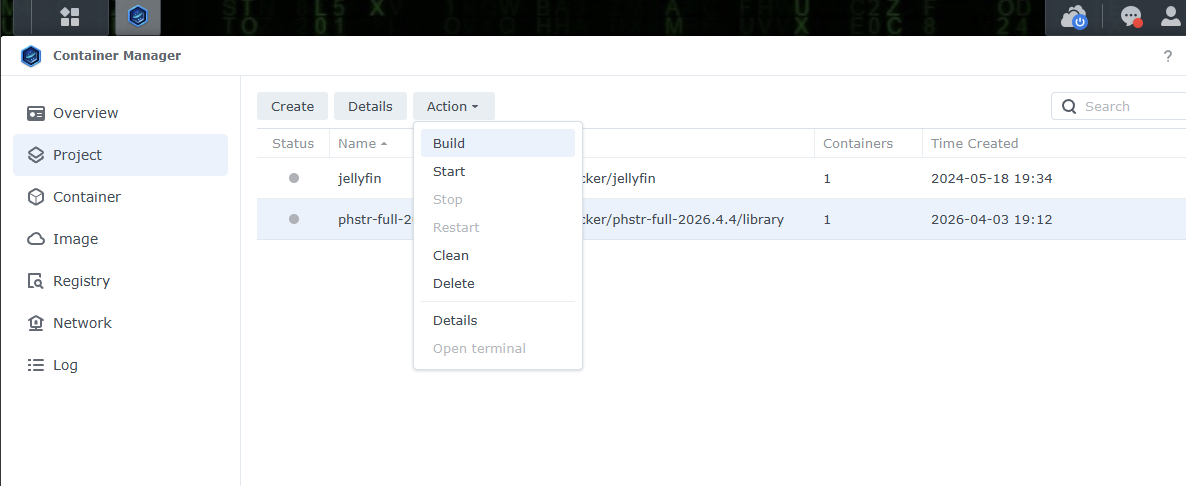
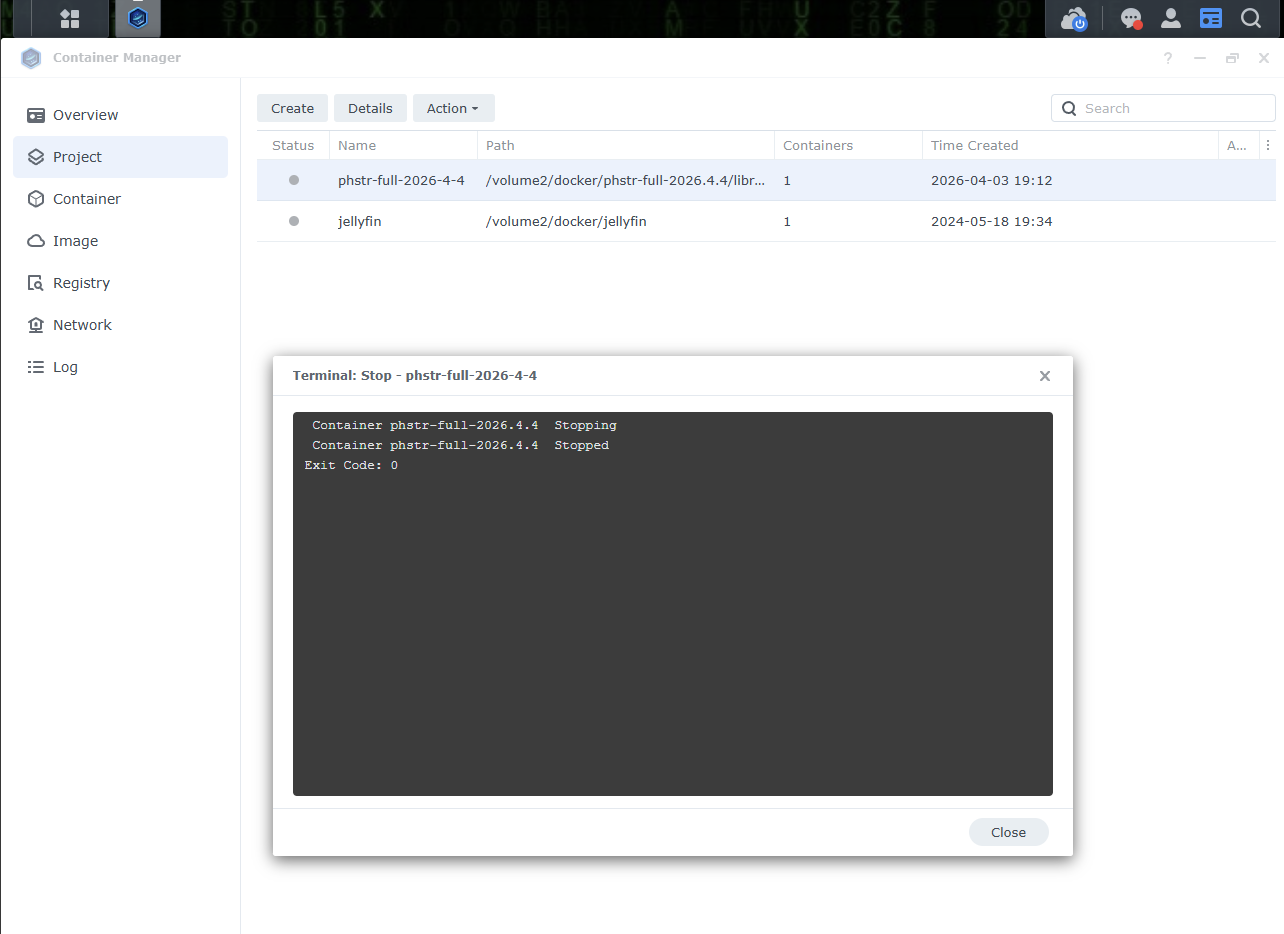
- ** Project → select Project → Action → Stop**
- Action → Clean.
This deletes the container that was previously built, although none of the PhotoStructure library data is deleted. If you go to the Container tab; you should see that the container previously built is now gone. - Edit YAML Configurations tab, and make desired changes.
- Save.
- Build and start the project (rebuild the image). Or if you can’t remember whether you first cleaned, click Only save the changes and then do Action → Clean followed by Action → Build.

Updating latest
- Dr. Frankenstein: Updating Containers in Container Manager
- Synology: How to Update Containers in Container Manager – Marius Hosting
- Synology: How to Update Docker Image – Marius Hosting
One step with latest branch:
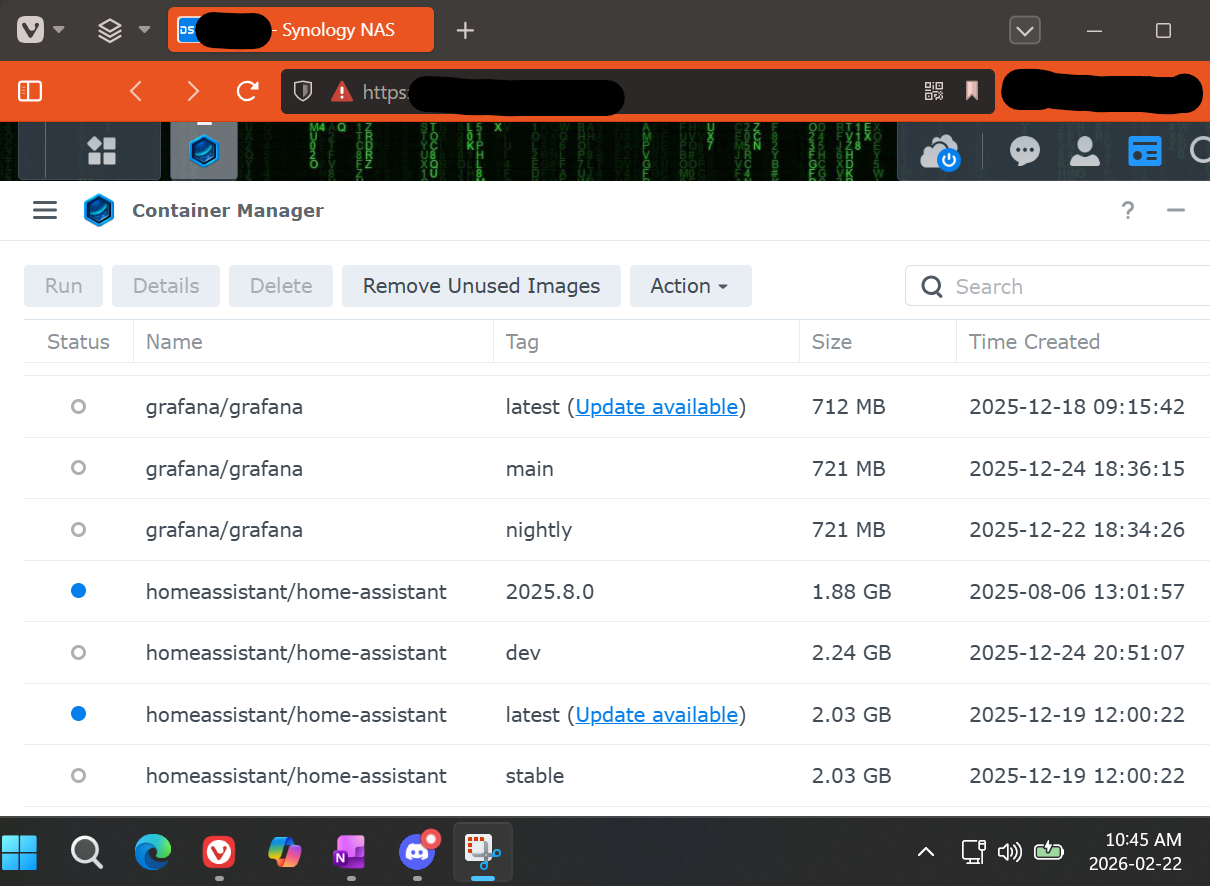
- Container Manager → Image → Update available
This automatically downloads the updated image then restarts the container.
Note it does not work for stable, main, beta, or any other named tag I’ve tried. Synology Version: 20.10.23-1405 (2023-05-22) says, “Supports automatic update detection for images with the ‘latest’ tag.” I have not been able to find anything in Synology docs or my own testing saying anything is supported besides “latest”.
Updating non-latest
Synology Container Manager Projects using beta, stable, or other tags can be updated by with these steps:
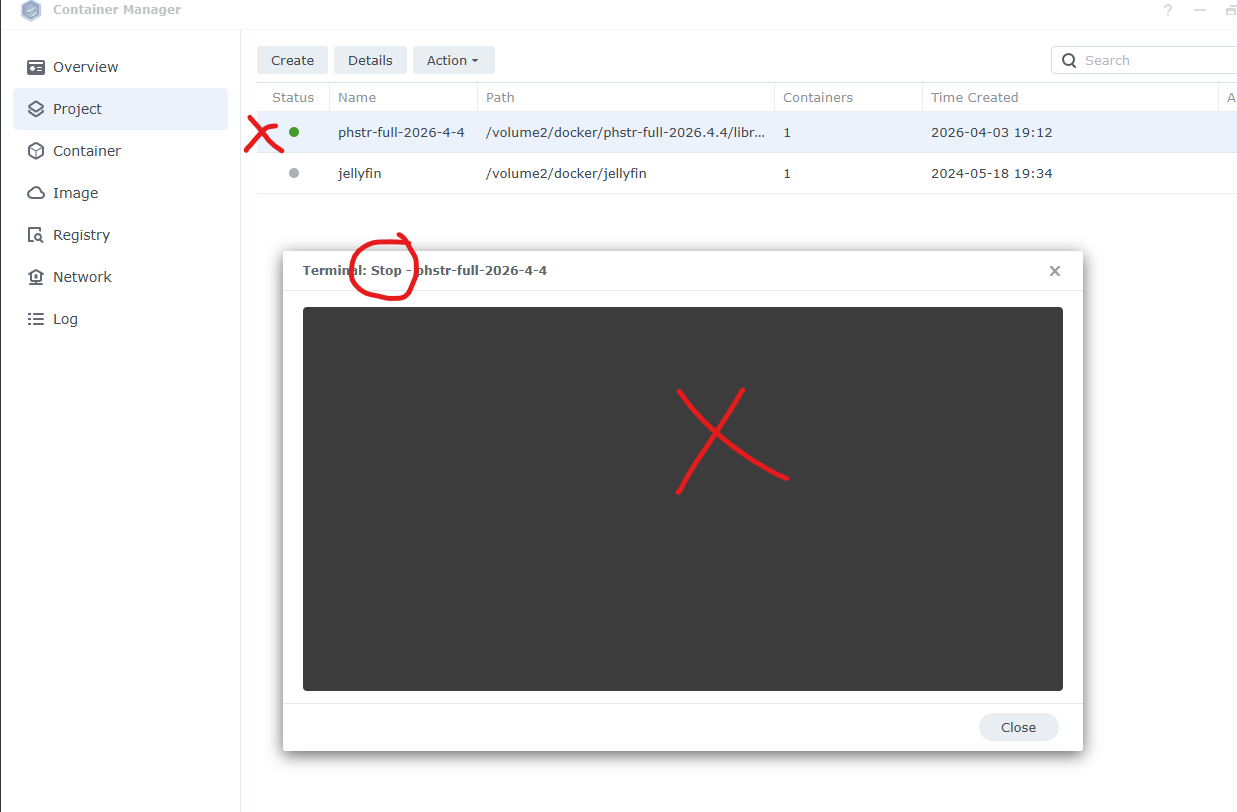
- Project → select Project → Action → Stop
- Project → select Project → Action → Clean. Note that Synology documentation says “Clean” is
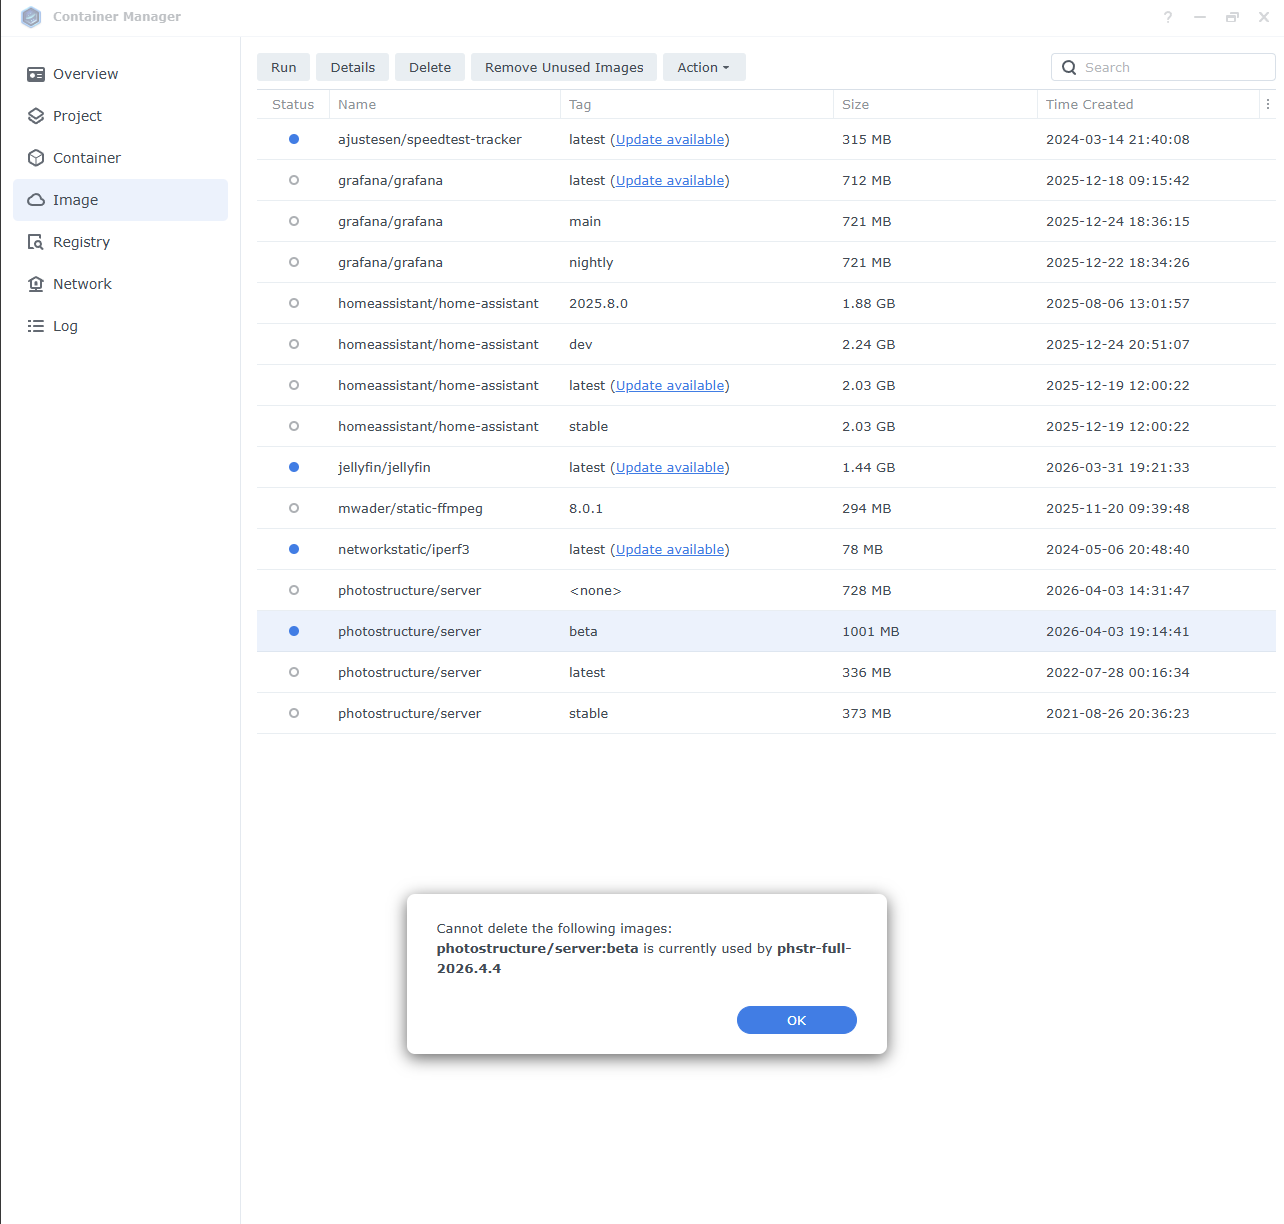
docker-compose downto “Stop the containers and removes containers, networks, volumes, and images created by the docker-compose.yml of this project.” - Image → select tagged PhotoStructure images (
betaand<nonein my case) → Delete - (I did not delete the
mwader/static-ffmpeg:8.0.1image - Project → select Project → Action → Build
- Successful update without using
latesttag and without entirely deleting the project!
SSD Volume (M.2 and 2.5")
Starting with DSM 7.2 and some Synology models, SSDs (2.5" and M.2) can be created as a volume for a Synology Shared Folder. This is ideal for use for docker containers in general, PhotoStructure’s /ps/library, and especially /ps/tmp. See the folders explained in more detail at PhotoStructure for Docker.
Older Synology products like the DS920+ and DSM 6.x only supported using M.2 SSDs as a Synology-managed read/write cache. But now my DS920+ with DSM 7.3 does support using 2.5" SSDs, so my system has three HDD (Volume 1) and one 2.5" SSD (Volume 2).
These scripts (and associated Synology subreddit threads) appear to make it easy to unofficially implement where Synology has not officially enabled it. GitHub - 007revad/Synology_HDD_db: Add your HDD, SSD and NVMe drives to your Synology’s compatible drive database and a lot more
Faster import/rebuild (and less responsive NAS)
Synology wasn’t using enough CPU resources for my liking. See discussion at Import and resync faster on Docker NAS? for parameters you can play with, and of course more info at PhotoStructure’s advanced settings | PhotoStructure. However I haven’t done specific performance testing yet, so do not have a specific recommended setup for Synology DS920+ and others with the same CPU.